CLICK HERE FOR FREE BLOGGER TEMPLATES, LINK BUTTONS AND MORE! »

Monday, April 2

Trip of a Lifetime

We've had a SUPER busy last couple of months!  From visits with family, to birthdays, to a trip to Disney it seems like we've been going non-stop :)  I'll be back to creating soon but in the meantime here are a few photos from our recent adventures!


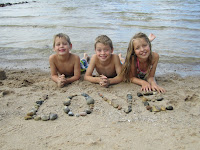
My three little Valentine's <3


A trip to the beach in Northern Michigan- it was still freezing but the kids had a blast!


Hanging out at Hollywood Studios!


Friday, February 3

LOVE Frames

It's almost time for my most favorite holiday- Valentine's Day!  I've spent the last few weeks brainstorming ideas for this years Valentine's surprise for my family and I've come up with a few I'm REALLY excited about!

While at Michael's the other day I found these adorable little frames for $1.50 a piece that I knew would be perfect for making a Valentine decoration that could be left out all year long.  I also went and grabbed a handful of paint chips that coordinated with the frames from a local paint store.

Once I got home I got out my scissors, white card stock (for the background) and some photo stickers (you could just as easily use glue, I just happened to have the double sided stickers in my scrapbook supplies.)  Next I cut out the letters for LOVE substituting a heart for the O and some little flowers.  I used the paper in the frame to cut out the right size card stock backgrounds then attached the letters and flowers to the paper (I was careful to avoid using the same color letter as the frame but you could totally color coordinate if you wanted to!)

Voila!!  A super easy and cheap project that is totally adorable :)  Stay tuned for more projects coming soon!

Tuesday, January 31

Kid Art

After a weekend away from my kiddos I decided to do a special project with them not only to spend a little quality time but to focus on the importance of family!

I gave each kiddo a piece of white card stock and some crayons and asked them to make a family portrait.  They could draw each member however they wanted but I wanted them to make something that represented us all.  I have to admit- their ideas exceeded my expectations!

Corinne drew us all as birds...


Connor thought we's look good as hearts...


and Lleyton decided he should be sporting a football helmet while holding my hand :)


It was a lot of fun to see them so excited to create and now we have some original artwork to remember this time in their lives- it's a win/win :)

Friday, January 27

GIVEAWAY!!!

What's better then getting free stuff??  How about getting something homemade just for you?!

Once I reach 25 followers I will choose one of those names at random to get a little gift... homemade by me!  It could be a quilt- maybe a painting- or a framed print!

Let your friends know!

Thanks for following! :)

Tree Art!

Anyone who knows me knows that I LOVE trees!  So, when I saw this adorable idea on two girls being crafty I knew I had to try it!  (Their tutorial is great so check it out for further instructions!)

The dots are smaller on the first then I would have liked but....

I really liked the way the second one turned out.

I hung them together on my bedroom wall  :)  I see a third and fourth joining them soon- maybe one for each season?

Play with colors and size and layout to fit your tastes/decor.  Have fun with it!

Monday, January 23

Hand Print Monsters!

After a night of freezing rain the kiddos had an unexpected snow day- I didn't panic (too much) though because I had seen this adorable project on Pinterest that I had wanted to make for art for their rooms.


This project is so simple!  All you need is...
acrylic paint in your choice of colors
canvas (any size)
2 paint brushes (large for painting the hands a smaller detail brush for the mouths)
googley eyes
tacky glue
a sharpie (I used it for the mouths because it looked cleaner)

Paint your child's hand the first color- you can omit different fingers to get different looks like we did here-


Next, place their hand on the canvas where you want to put the monster.  I'd press down on their hand to make sure it covers well but you can also go over it with the same brush you painted their hand with to fill in any gaps


This is what they look like before we added their faces...


Next add whatever eyes you choose with the tacky glue.  You can paint the mouths on (tongues sticking out, fangs for teeth) and/or use the sharpie marker.

My daughter Corinne's monster- we loved the eye lashes!

Connor's monsters- I love that he wanted the one to be upside down :)

and Lleyton's monsters- you can play with the placements 

The kids had a lot of fun making these little monsters!  We hope you do, too! :)

Monday, January 16

Quote Love Part II

I loved the two I made yesterday so much I decided to make two more today!

They are my kids <3

A mother's love.

Now that they all have matching frames I'll have to find a place to hang them all together :)